Get Your ECA Done For Canadian Visa without the help of a consultant

The most important thing you need to do before starting the process for your immigration or study visa application for Canada is to get your ECA done.
Simply put, ECA is the Educational Credential Assessment which is used to validate and determine the equivalency of your educational qualification(s) to a Canadian one. While there are different types ECAs, you can be sure of one thing – you need to get one for immigration purposes. It is critical that you get this done before you start the study visa or PR application process as it takes some time to get completed. You don’t need any help with this as it is a very easy process and you can do this on your own.
IRCC (Immigration, Refugees and Citizenship Canada) has designated professional bodies for educational credential assessment and you can get this done from any of the designated professional bodies/organization listed below:
- International Credential Assessment Service of Canada: http://www.icascanada.ca/fsw
- World Education Services: http://www.wes.org/fswp
- Comparative Education Service: http://www.learn.utoronto.ca/ces
- International Qualification Assessment Service(IQAS): https://www.alberta.ca/iqas-immigration.aspx
- International Credential Evaluation Service: http://www.bcit.ca/ices/eca/
- Medical Council of Canada: http://mcc.ca/repository/educational-credential-assessment/
- Pharmacy Examining Board of Canada: http://www.pebc.ca/index.php/ci_id/3374/la_id/1.htm
We’ve listed the steps to be followed for getting your ECA for the 1st two organisations in the list for representation of the process below for your reference.
- International Credential Assessment Service of Canada
- Visit the website (http://www.icascanada.ca/fsw) and select your preferred language:

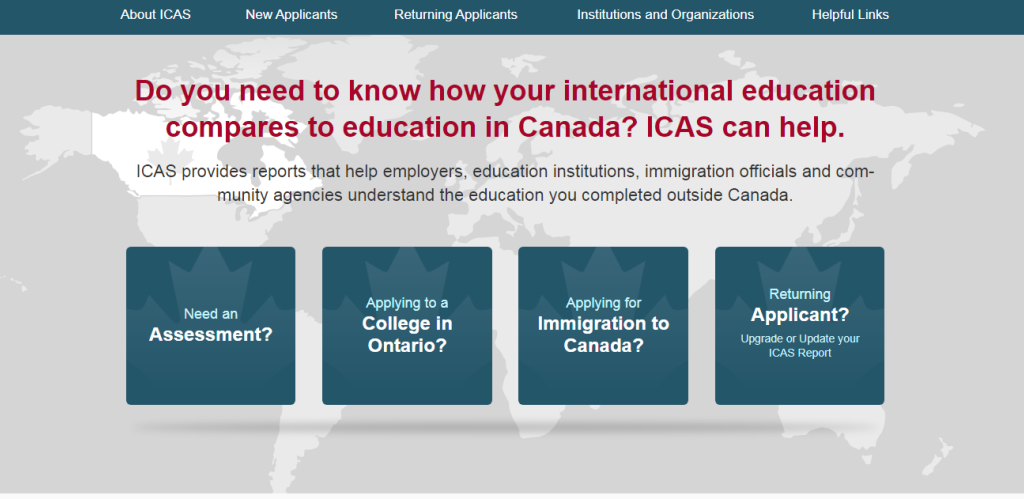
2. Make the appropriate selection from the available options:
Click on “Applying for Immigration to Canada” if applying for PR or make a relevant choice as per your application type.
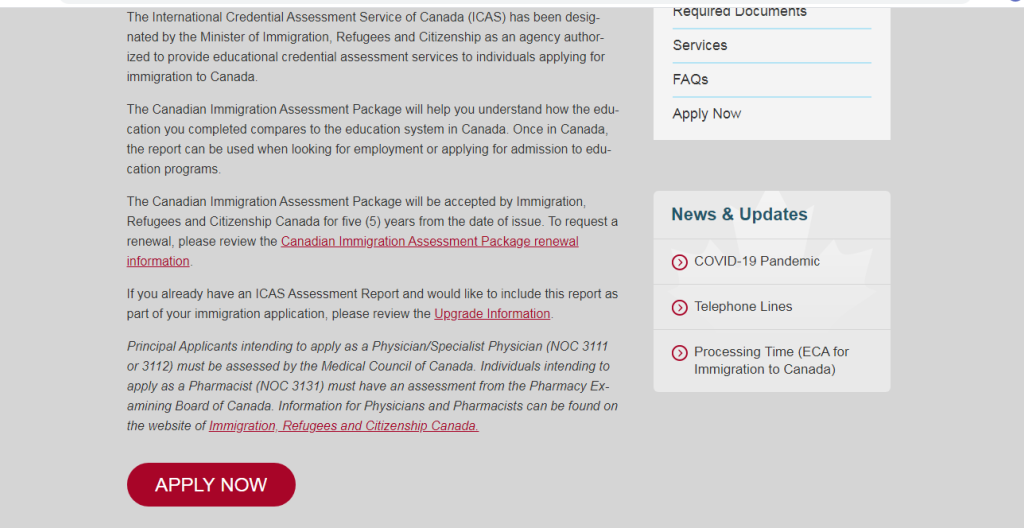
3. Click on Apply now
4. Provide Applicant Information:

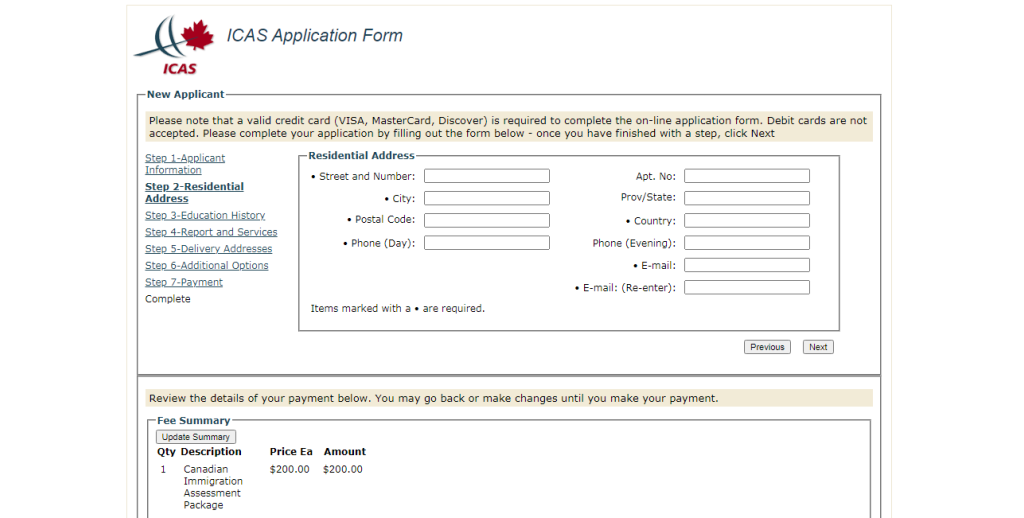
5. Provide residential address:
6. Provide required details for education history:

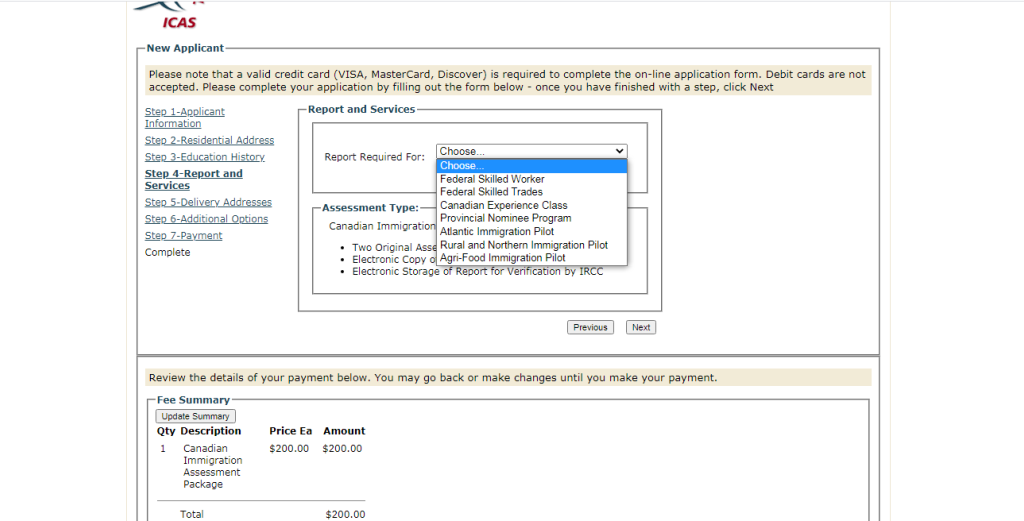
7. Choose the required report from the available options:
8. Choose the number of additional copies of the assessment (if) required and the preferred mode of delivery:

9. Mention additional remarks for delivery (if any):
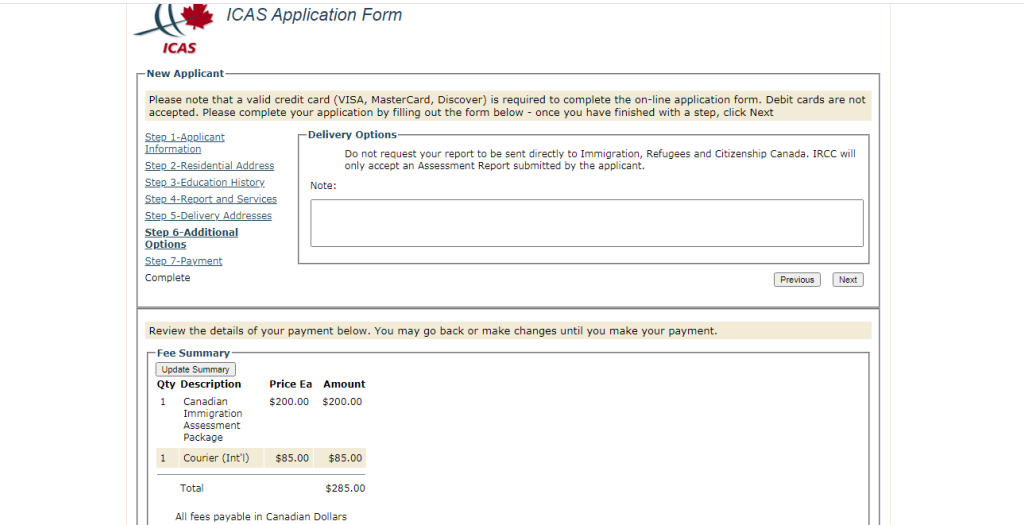
10. Complete the payment:
Note that the payment can be made using a valid credit card (VISA, MasterCard, Discover) and debit cards are not accepted for this. You would also be required to check all the relevant boxes here before proceeding to the payment gateway.
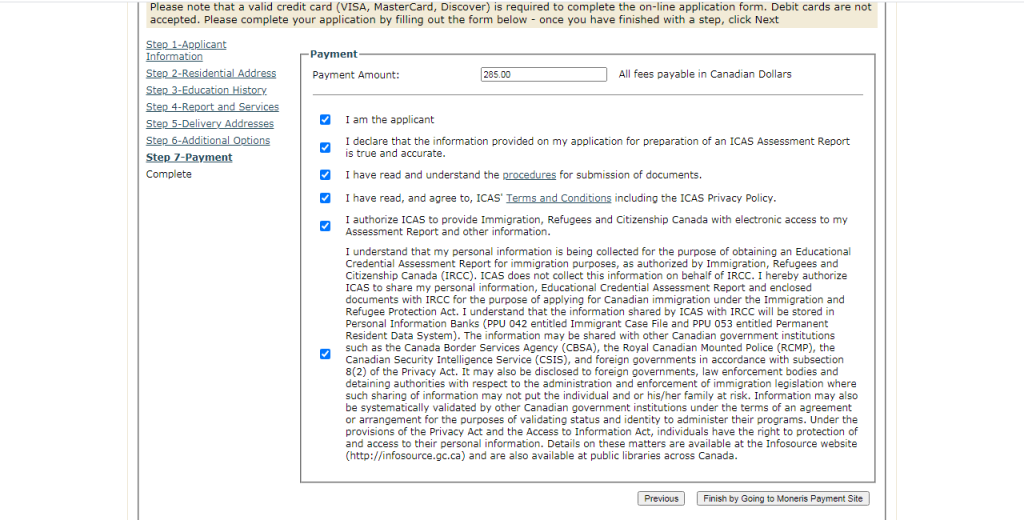
Post payment completion, you will get an email confirmation for the payment. Once this is done, you would be required to go to your university website and apply for the transcript(s) there too.
B) World Education Services:
1. Visit the website and click on “Get an evaluation” on the top right corner of the webpage:

2. Make the requisite selection of country:
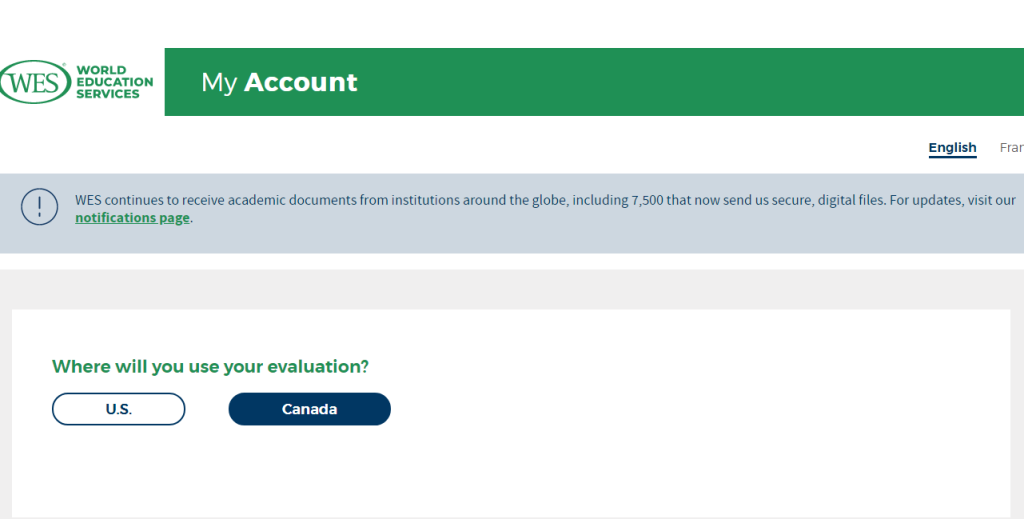
3. Select the relevant application type:

4. First time user would be required to provide an email address:
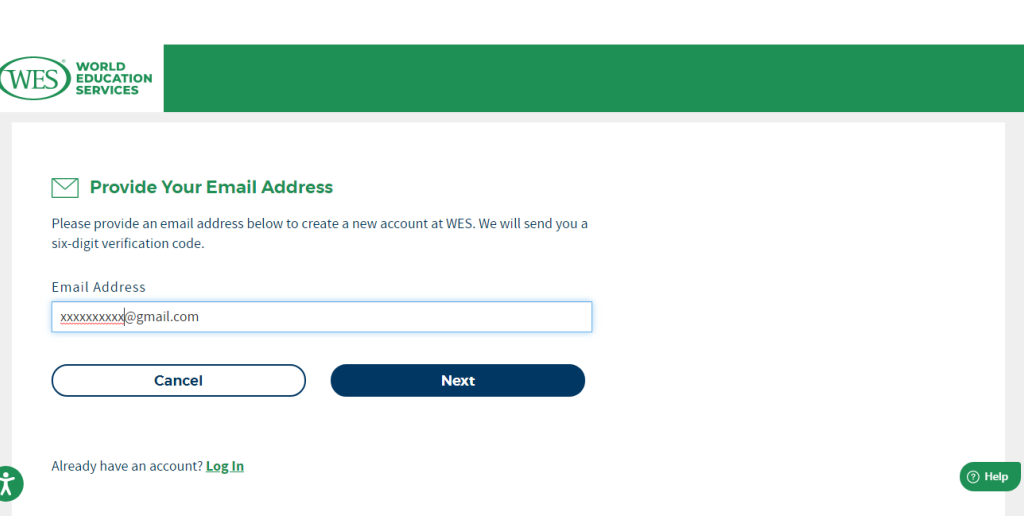
5. Validate your email address by entering the verification code received on email:

6. Click on “Continue” once the verification is complete:

7. Provide your personal details, choose a password for your account and click on “Create Account”


8. Provide the required details

Click on “Next” once all the required details are provided:
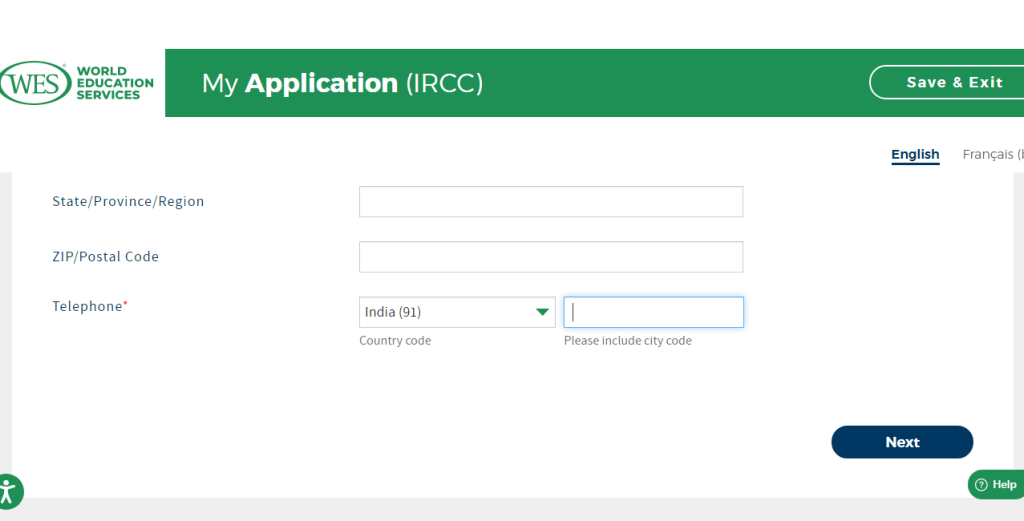
9. Read through the details provided carefully:
Note that the website clearly states that you need to request ECA only for your highest completed credential/educational qualification.

10. Provide the required details and click on “Save”:

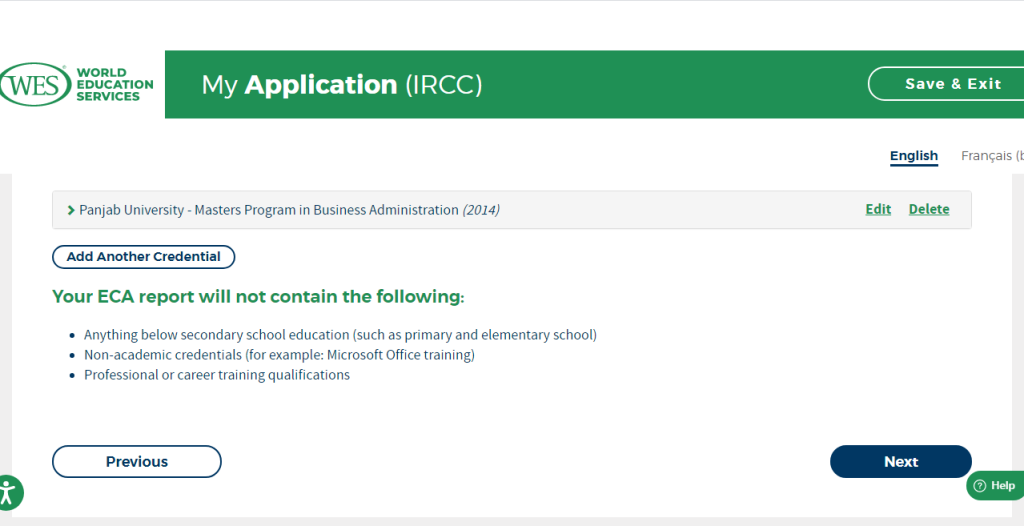
11. You will see that the credential/qualification submitted is reflecting on the screen:
In case you need to view or edit the details provided in the last step, click on “Edit”. You can also click on “Delete” here and return to the previous step.
Click on “Next” to advance to the next step.
12. Review your mailing/delivery address and add the address of the institution(s) receiving the report:

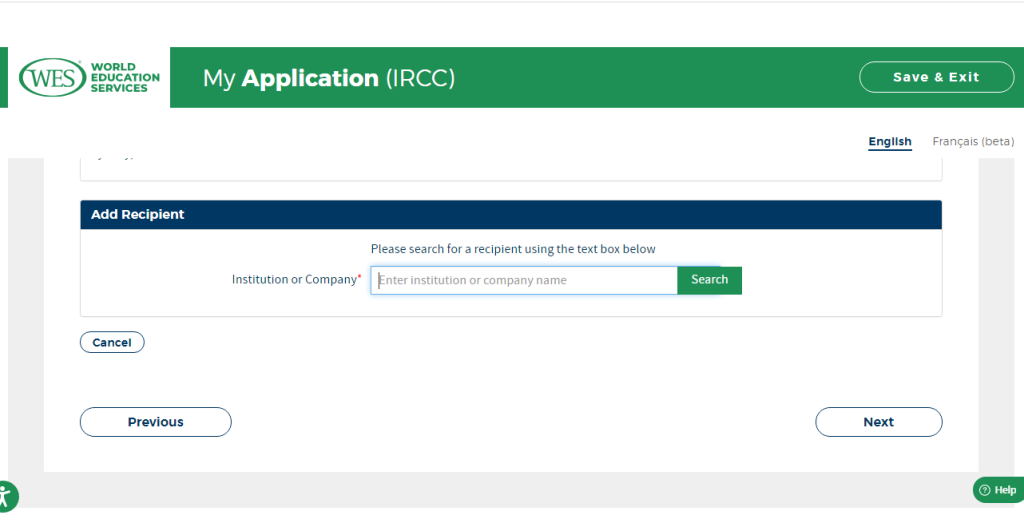
While the IRCC address is by default added, you can click on “Add Recipient” and add an address, if required:
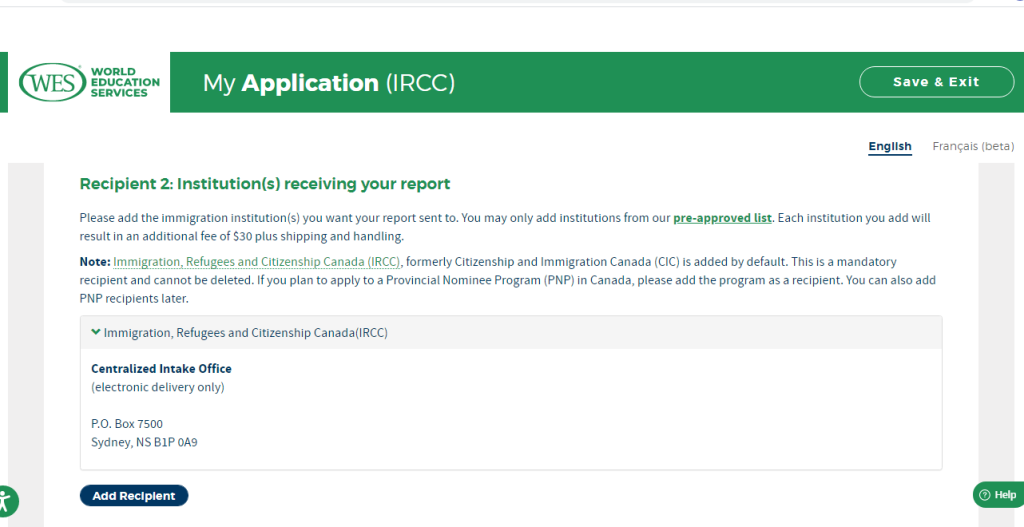
Click on “Next” once done.
13. Click on “Next”

14. Select a delivery option for all the selected recipients, as applicable:

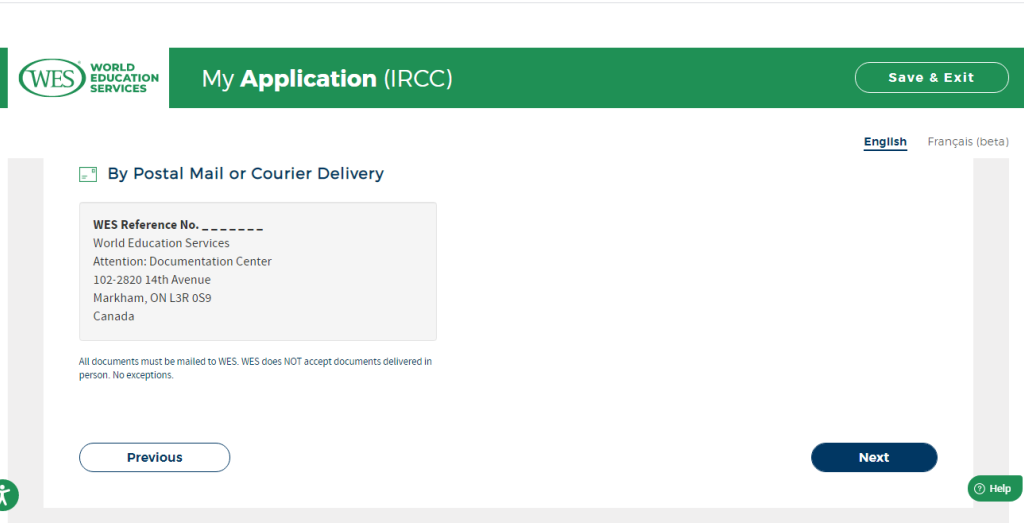
15. Read the next page carefully. This lists all the steps as well as helpful forms you may need to follow in order to submit a request with the educational body which awarded you the qualification for providing WES with the requisite documents.

Click on “Next” at the bottom of this page once done.
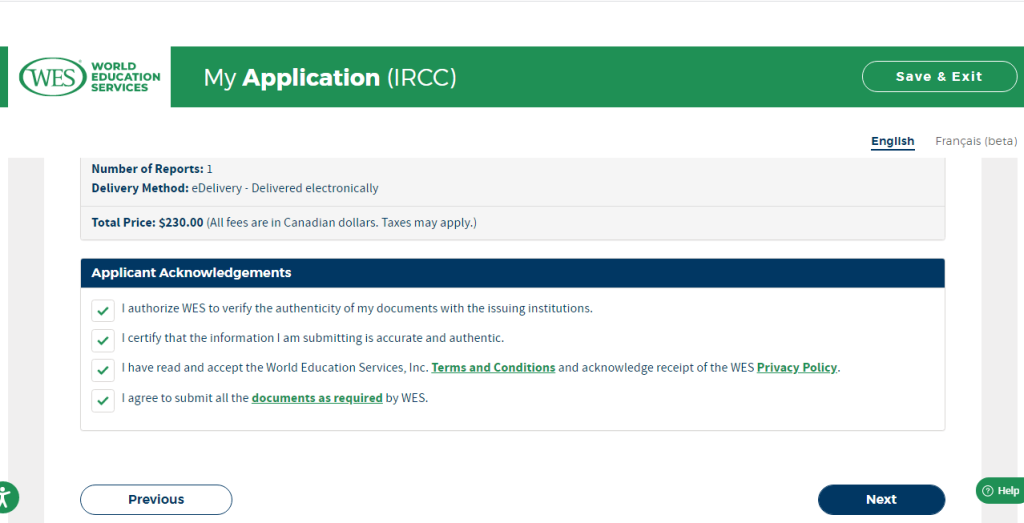
16. Validate the details provided by you so far for the application on the page. The charges for the WES application will reflect towards the bottom of the page. You will also see some checkboxes against some statements under “Applicant Acknowledgements” which you would need to select before clicking on “Next”.
17. Confirm/edit your date of birth on the page/ pop-up message:

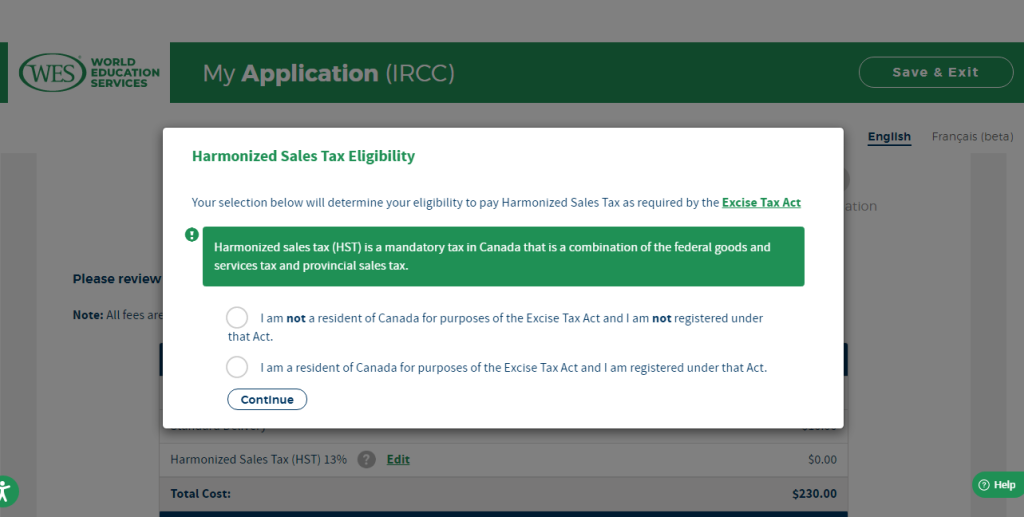
18. Make the relevant selection on the page/pop-up message that is displayed and click on “Continue”:
19. Make the relevant selection for payment method and click on “Submit”:

Post payment completion, you will get an email confirmation for the payment. Once this is done, you would be required to go to your university website and apply for the transcript(s) there too.
As you can see, the process is fairly simple! You can visit the website of the respective professional body/ organization in the list as per your candidature or application requirements and get it done without paying hefty amount to a consultant.